
Build: GlowFlora Clip
●Hardware ●Guide In ProgressStep-by-step assembly guide for the GlowFlora Clip — a battery-powered LED filament bloom that clips onto bags, costumes, and festival gear.
Prerequisites
- Read Tools & Materials and gather everything before starting
- Read Soldering Tips if you're new to soldering
- Have the BOM open for part reference
What You're Building
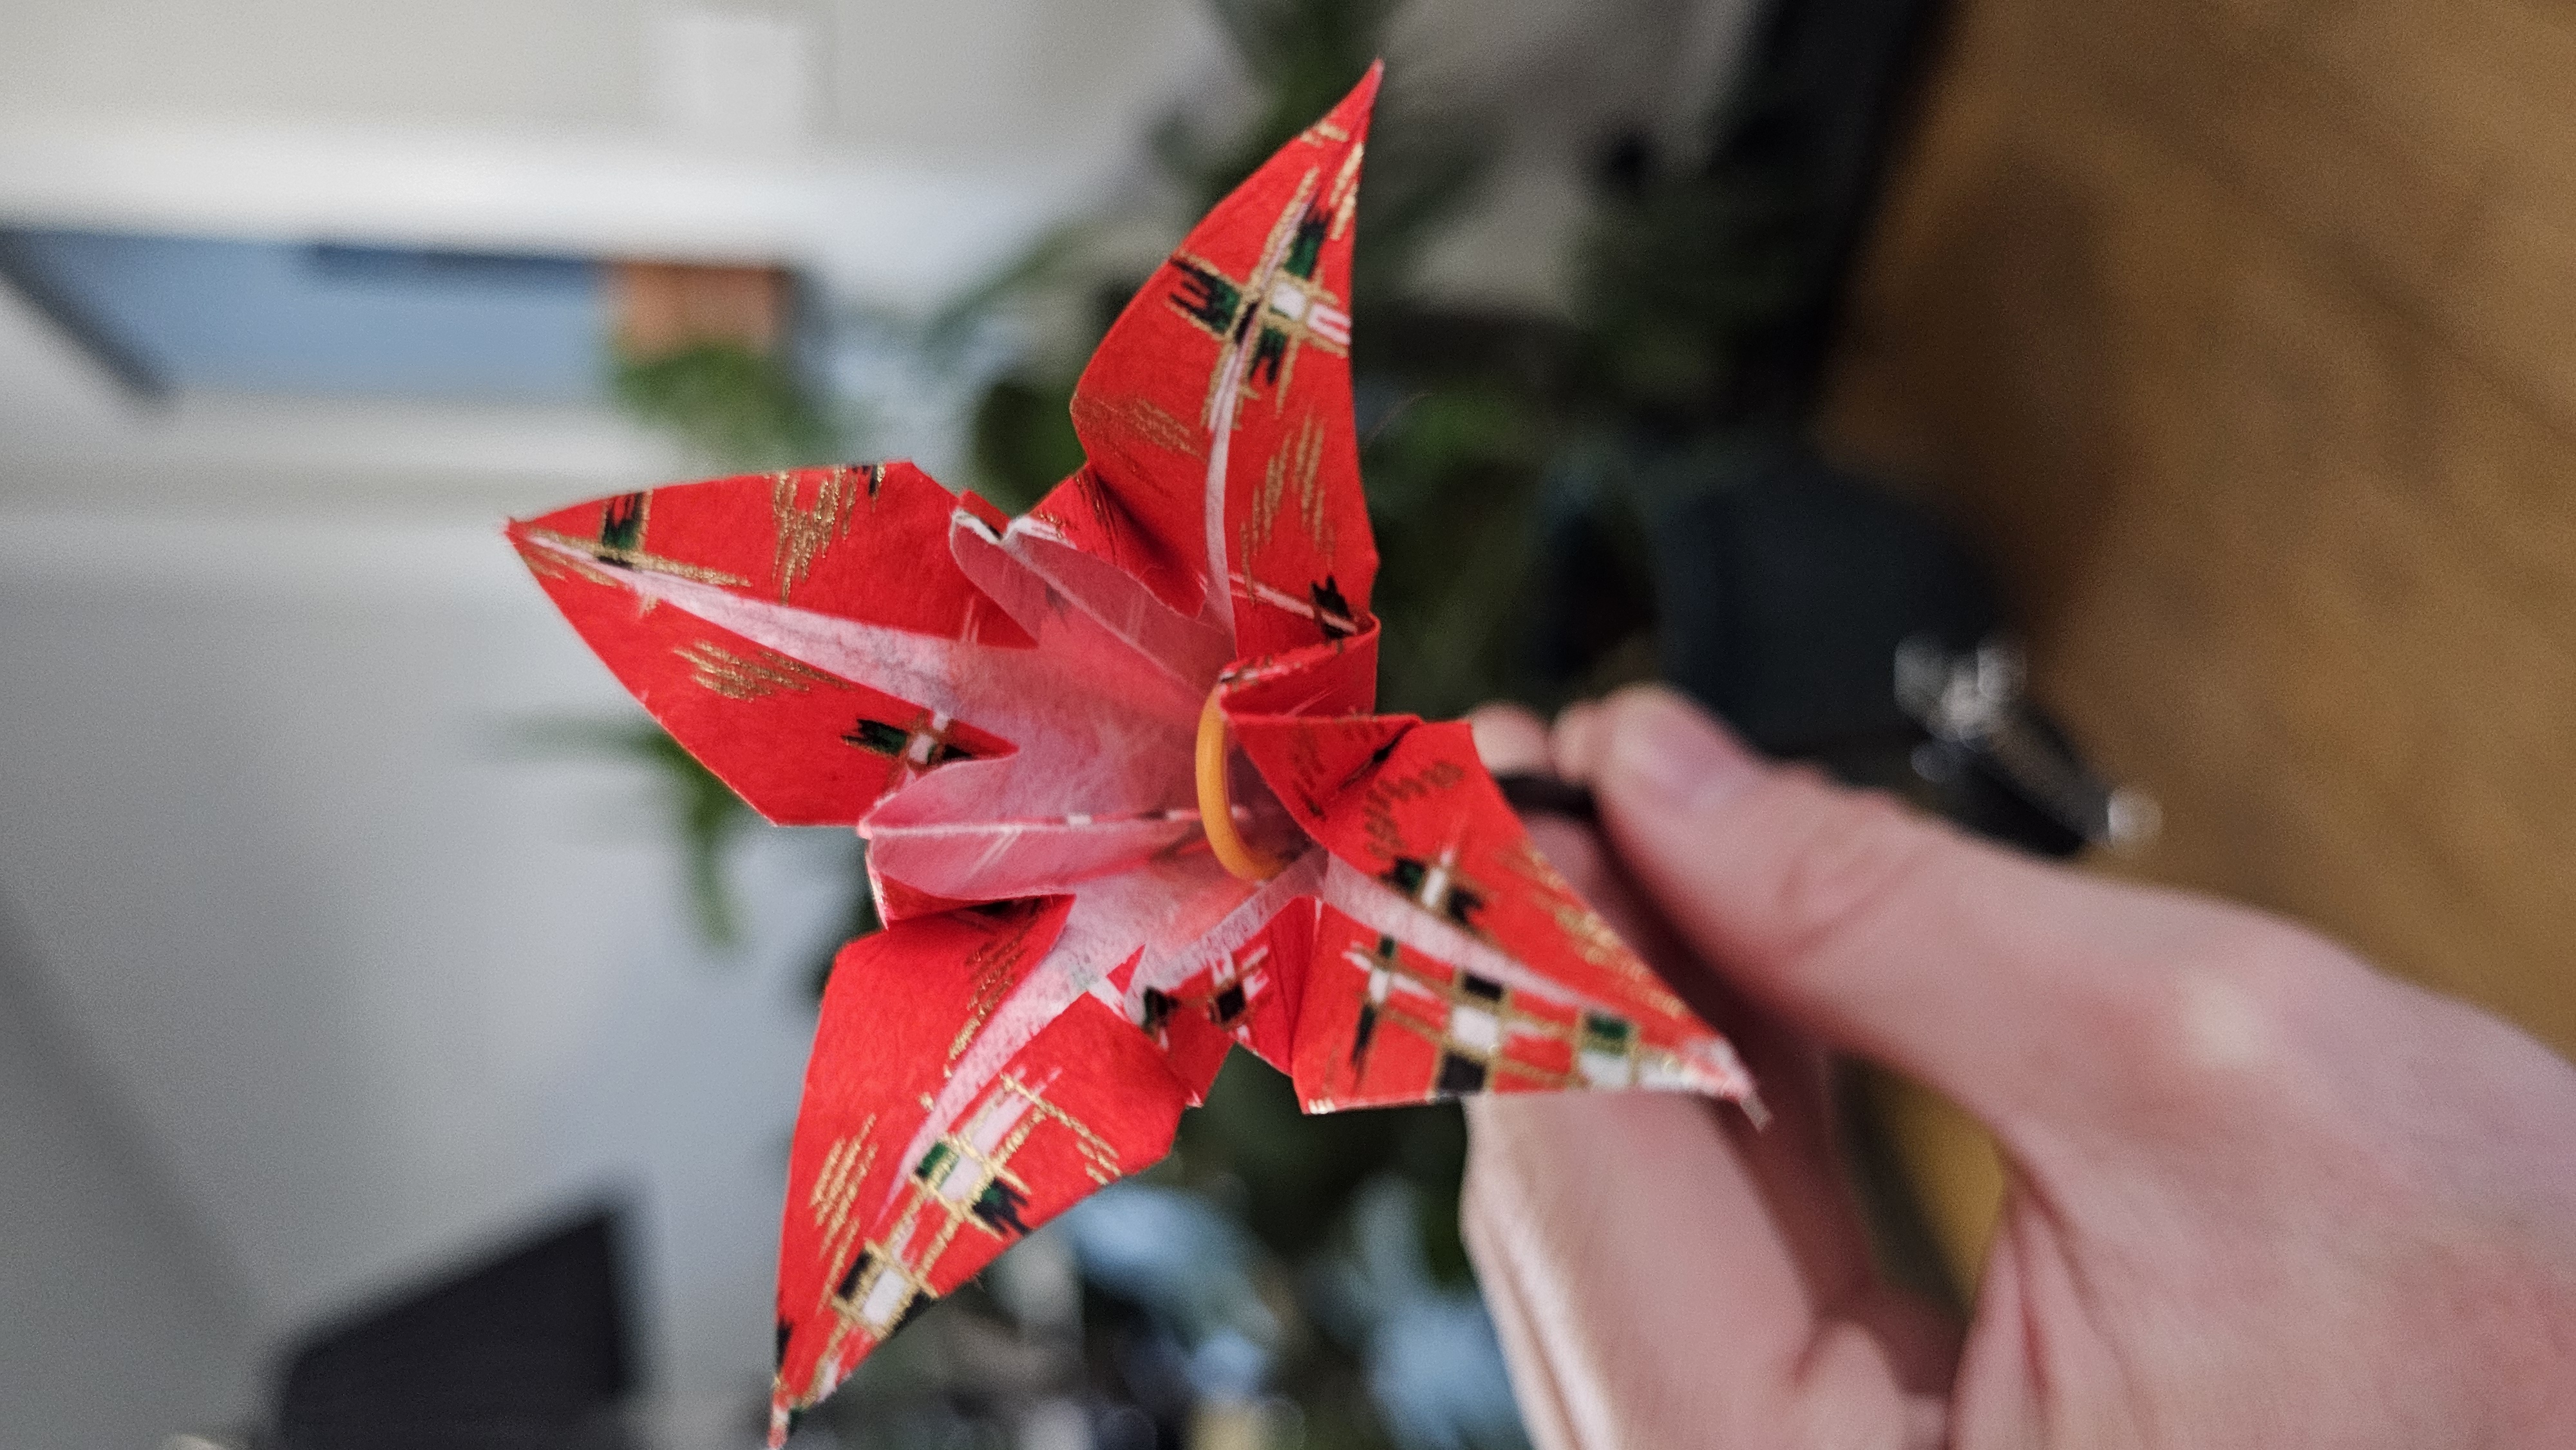
A compact clip-on light: an LED filament wired to a coin cell battery holder and secured inside an origami lily flower. Estimated time: 30–60 min.
Materials
| Item | Notes |
|---|---|
| LED filament | Bare LED filament |
| Battery holder | CR2032 coin cell holder with switch |
| CR2032 coin cell battery | — |
| Alligator clip | For the clip mount |
| 10cm origami paper | For the flower |
| Twist tie or 24 AWG steel wire | To bundle the stem |
| Heatshrink tubing | Various sizes — see steps |
| Hot glue sticks | — |
Tools
| Tool | Notes |
|---|---|
| Soldering iron | Temperature-controlled preferred |
| Hot glue gun | — |
| Scissors | For paper + heatshrink |
| Heat gun | Optional — can use lighter carefully |
| 3D-printed soldering jig | Optional but highly recommended |
| Origami fold press | Optional — helps pre-crease the fold pattern |
Soldering Jig
Print this before you start — it holds the flexible LED filament and stem steady while you solder.
Step 1 — Prepare the Stem
- Tin the tips of the battery holder wires so they don't fray during assembly.
- Twist the wires together with a twist tie, leaving about 2cm of twist tie at the base to secure.
- Hot glue the twist tie to the back of the battery holder — avoid blocking the lid or switch.
- Slide heatshrink tubing over the twisted wires. Cut it so 5–10mm of wire extends beyond the end of the tubing.
- Shrink the tubing with a heat gun or quick passes with a lighter — be careful not to melt the wires.
You now have a stem assembly.
Step 2 — Fold the Origami Lily
Fold an origami lily from the 10cm paper. Optionally use a fold press to pre-crease the pattern.
Once folded, cut ~5mm off the base of the flower so the stem wires can slide up through it.
Step 3 — Slide on the Junction Heatshrink
Don't skip this step
You can't add it later.
Cut a 12mm piece of heatshrink and slide it onto the stem assembly now — before attaching the flower.
Step 4 — Slide the Flower onto the Stem
Slide the flower down over the stem assembly so it sits loosely in position. Leave it there for now — you'll glue it in a later step.
Step 5 — Test LED Polarity
Before soldering, turn on the switch and hold the LED filament wires to the battery holder terminals to test polarity and confirm the LED works.
- If it lights up — note which wire is positive (+)
- If it doesn't — flip the filament and try again
Always test first
LED filaments are polarized. Soldering them backwards means desoldering a tiny fragile joint. The test takes 5 seconds.
Step 6 — Solder the LED Filament
- Use the 3D-printed jig (or helping hands) to hold the filament and stem steady.
- Quickly tin the LED terminals first.
- Bend the stem wires so they sit parallel to the terminals in the jig.
- Solder each wire to its terminal — work fast to avoid damaging the filament or melting the wires.
Step 7 — Stress Relief
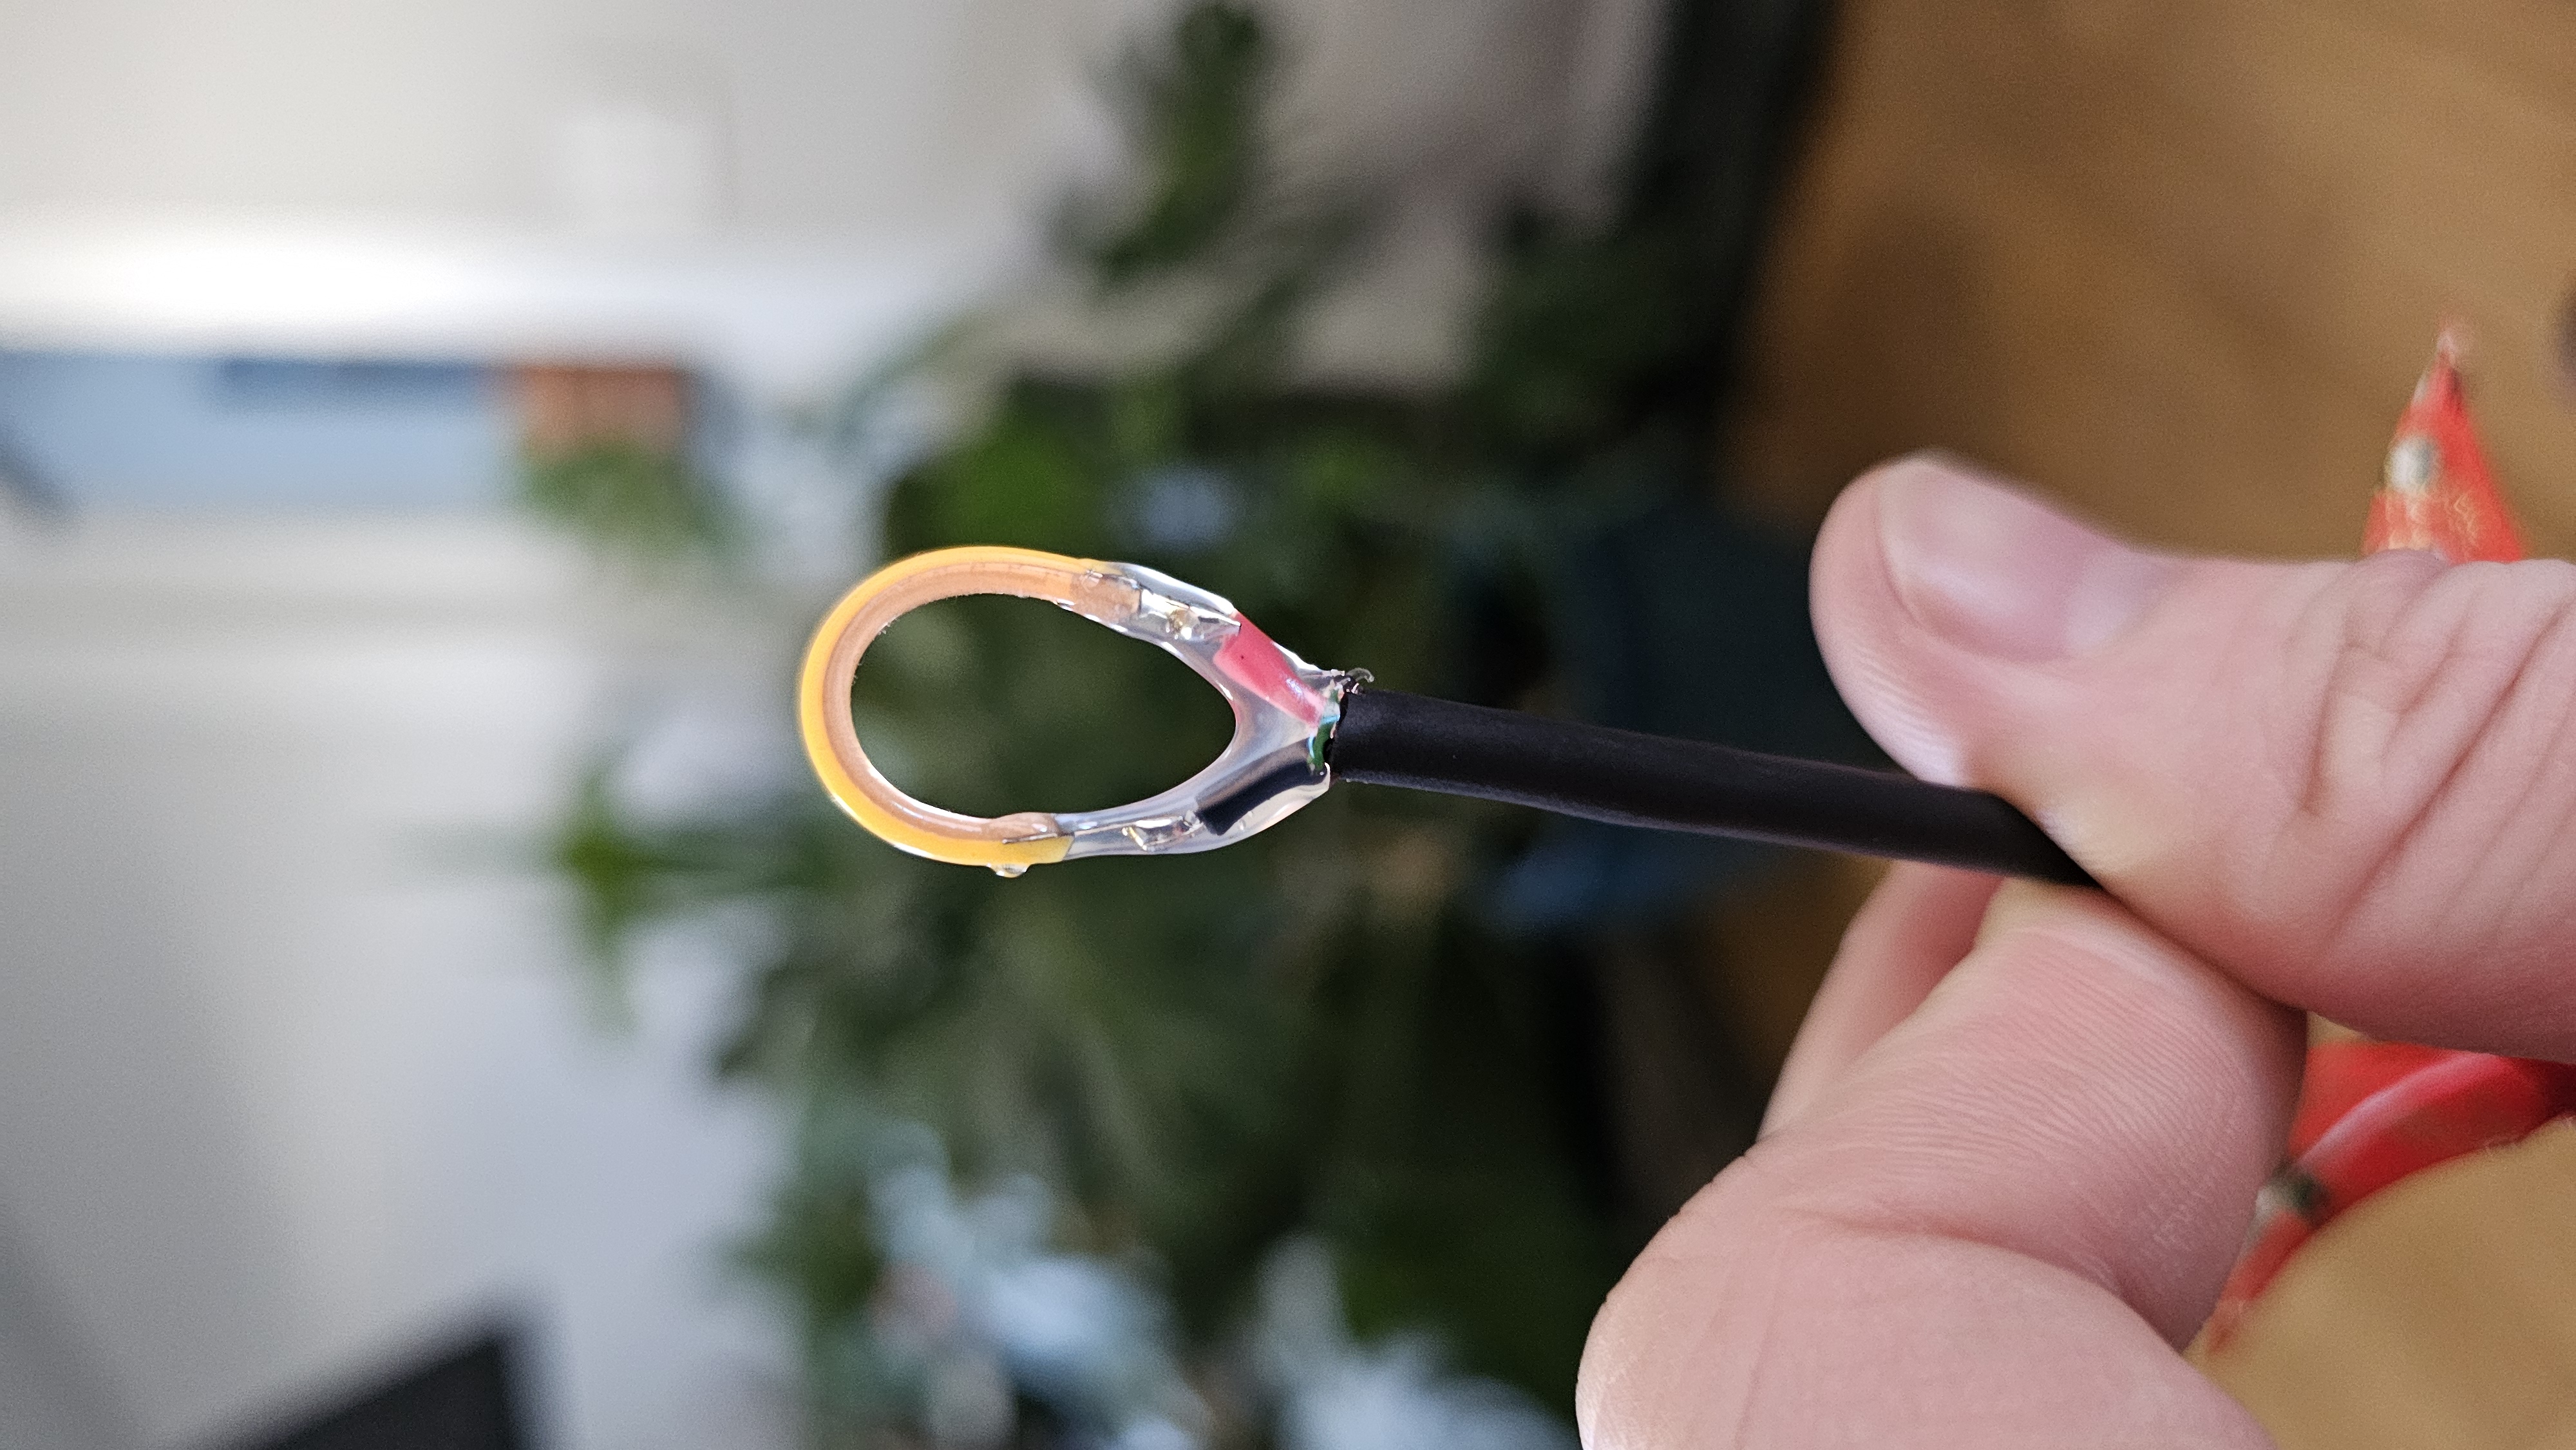
Hot glue over the solder joints and wire ends to protect them from mechanical stress.
Step 8 — Attach the Flower
- Apply a small bulge of hot glue to the stem just above where the heatshrink ends.
- While the glue is still molten, carefully slide the flower down over it so the glue only contacts the flower's base.
- Lightly press the flower base into the glue so it bonds flush to the stem.
- Hold in place until the glue solidifies.
Step 9 — Secure the Junction
Slide the 12mm heatshrink band (from Step 3) up over the stem-flower junction and carefully shrink it with a heat gun or lighter.
Done
Switch it on and admire your work.
Troubleshooting
- No light → check battery orientation and LED polarity at the solder joints
- Flickering → cold solder joint — reflow with the iron
- Dim → battery may be discharged; try a fresh CR2032